> ## Documentation Index
> Fetch the complete documentation index at: https://nuggets.life/docs/llms.txt
> Use this file to discover all available pages before exploring further.
# OIDC
> OpenID Connect integration guide for secure identity verification. Configure OIDC clients, QR code flows, and custom verification scopes in applications.
You can integrate Nuggets' secure identity verification into your own app using our **QR code flow**, powered by the [**OpenID Connect (OIDC)**](https://openid.net/developers/how-connect-works/) protocol.
***
## Create a Client
To begin, [create a partner account](/docs/getting-started/accounts-portal) on Nuggets.
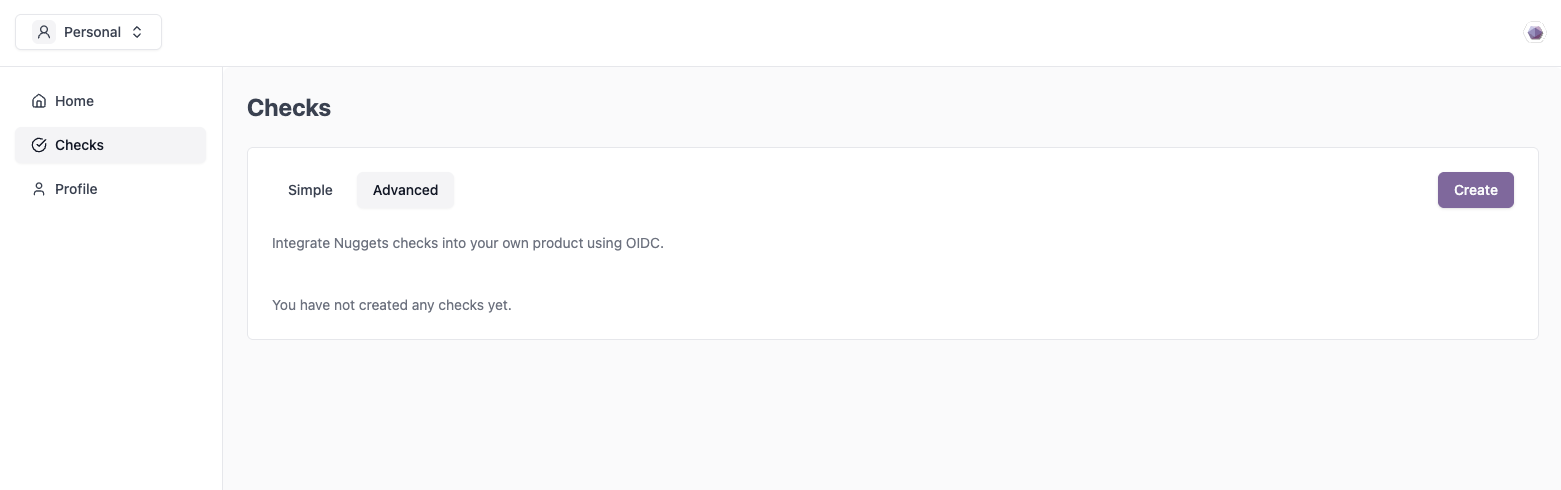
In the Nuggets Account Portal, an **OIDC Application Client** is referred to as an **"Advanced Check"**:
 ### Configure the Client
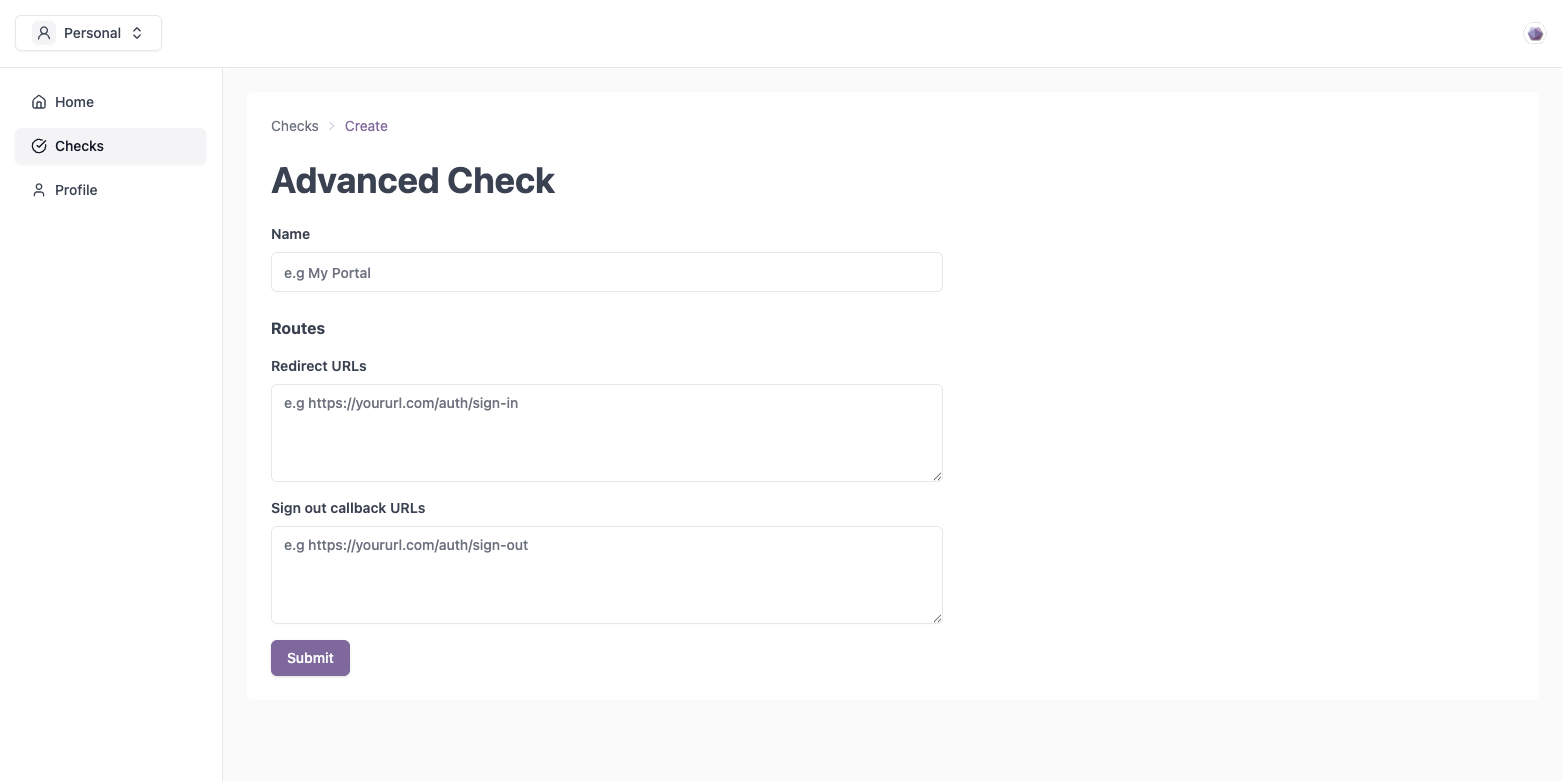
When creating an Advanced Check, you'll be asked to provide your **Redirect URI** and **Sign Out URI**:
### Configure the Client
When creating an Advanced Check, you'll be asked to provide your **Redirect URI** and **Sign Out URI**:
 After setup, you'll be prompted to **download a private key**:
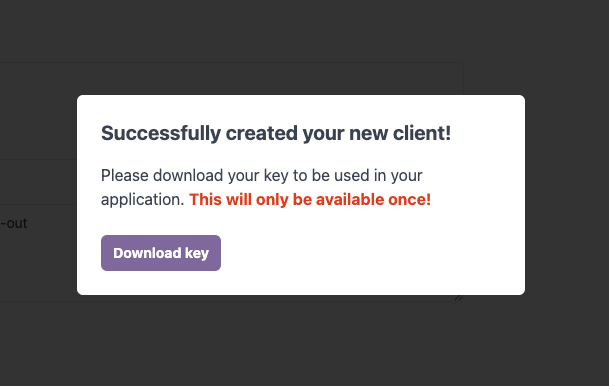 **Keep this key safe and secure** – it is critical to your application's
security.
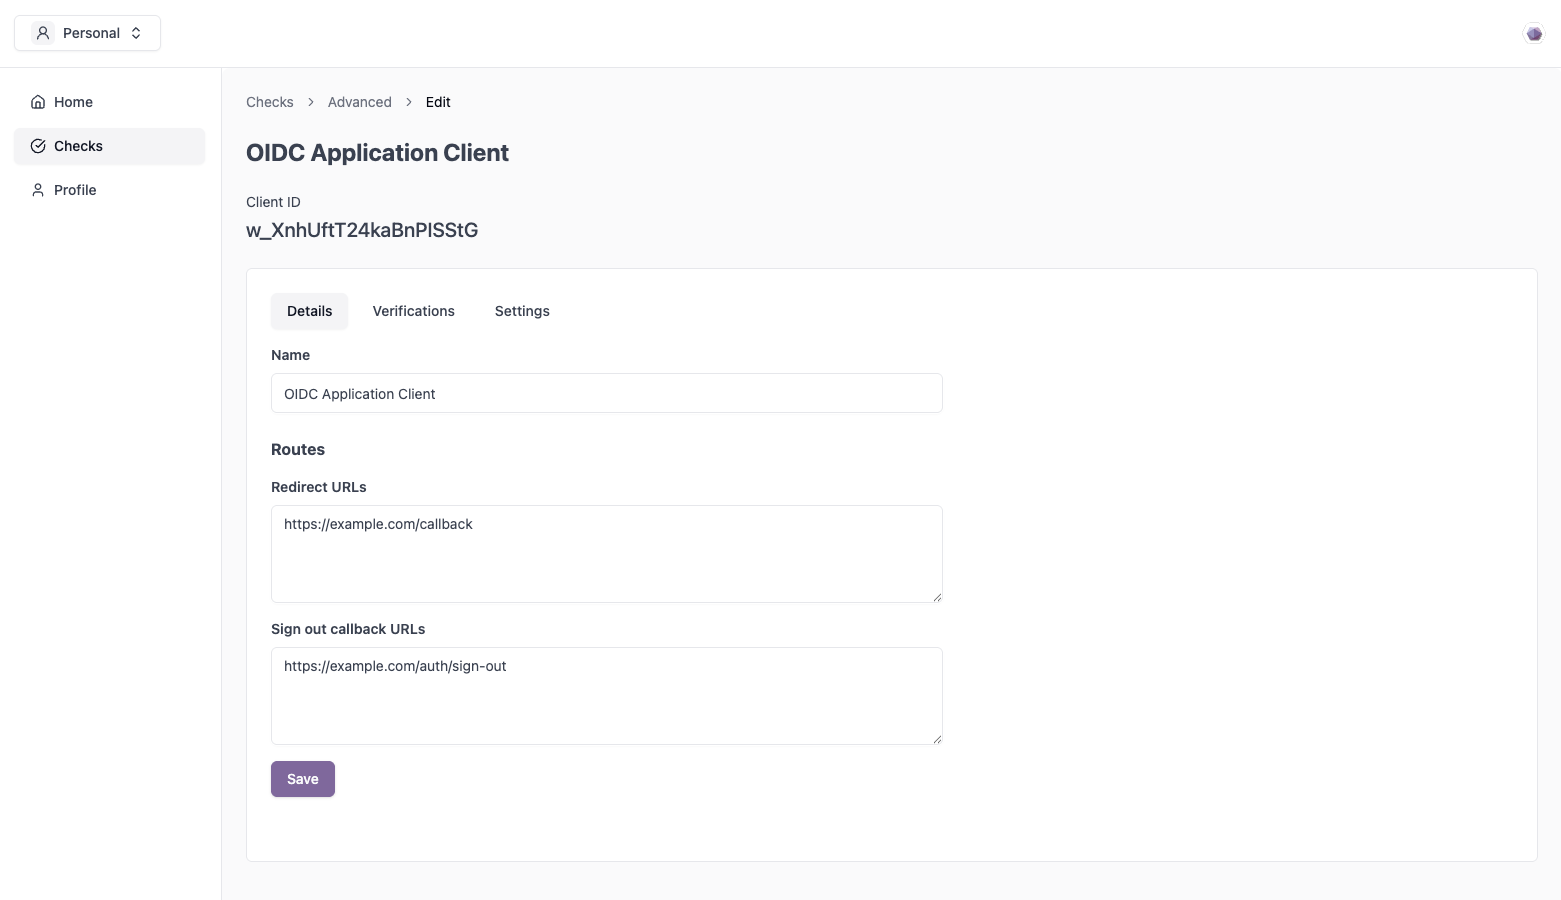
Once created, you'll be able to view the **Client ID** and additional configuration options:
**Keep this key safe and secure** – it is critical to your application's
security.
Once created, you'll be able to view the **Client ID** and additional configuration options:
 ### Add Verifications
You can now add **Verifications** to your client. These define the specific credential proofs you'd like to request from the user.
### Add Verifications
You can now add **Verifications** to your client. These define the specific credential proofs you'd like to request from the user.
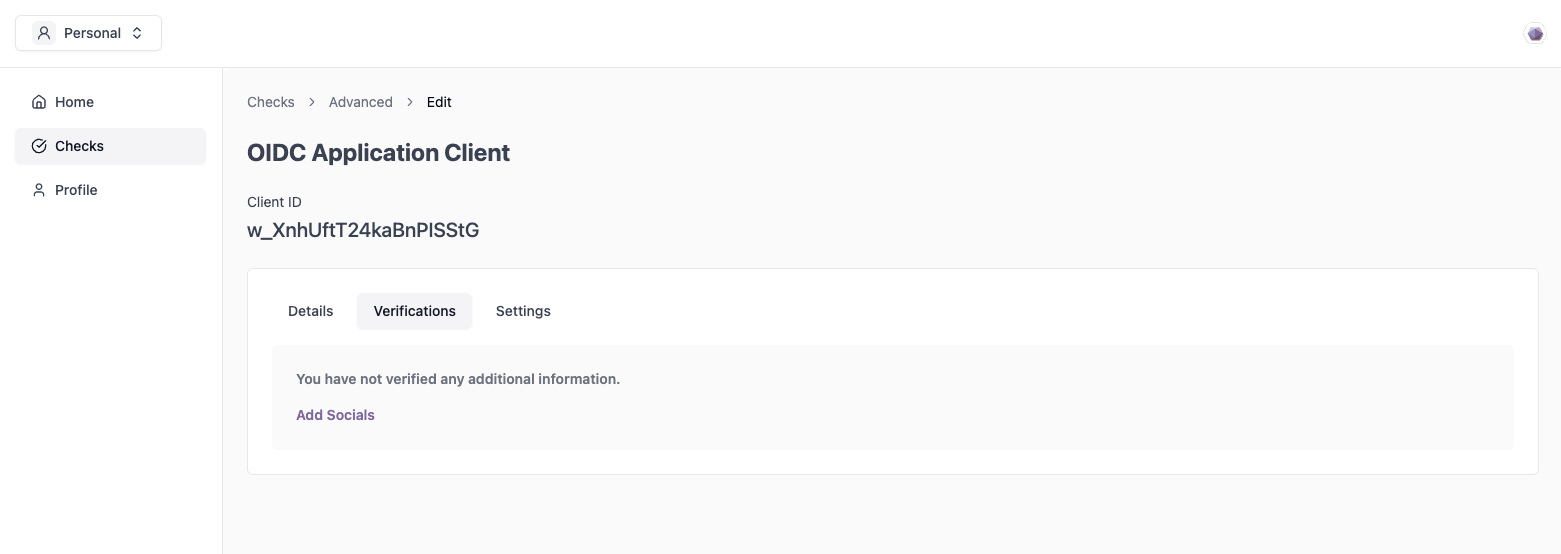 These appear during the user's interaction and help build **trust** by making it clear what information is being requested and why:
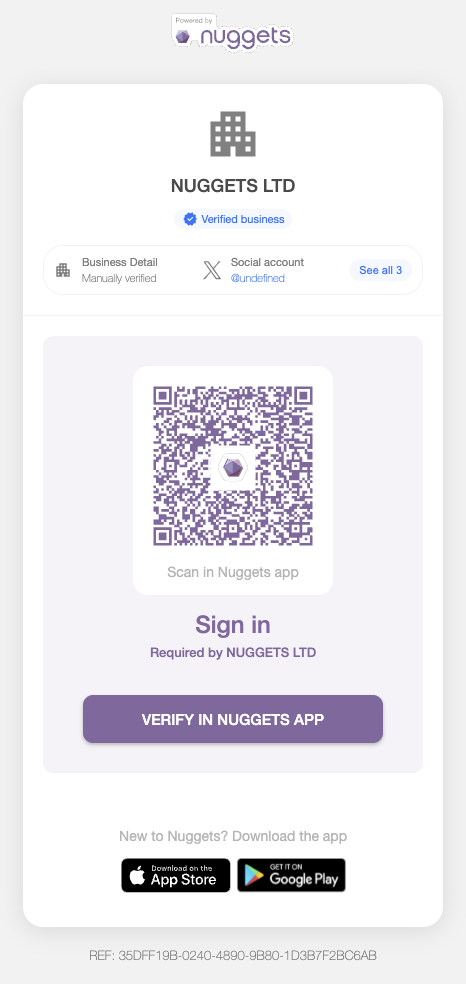 If no verifications are configured, users will see "unknown" as the requesting
party on the QR code screen.
***
## Configuring your flow
The user flow is determined by the OIDC scopes you specify. These scopes define what type of verification or information you require from the user during authentication.
* `rightToWork`: Request a Right to Work check from the user.
* `kyb`: Request the user to verify their business using KYB.
* `ageOver`: Request the user is over a specified age. This age will be passed as part of the PAR ([Pushed Authorization Request](https://datatracker.ietf.org/doc/html/rfc9126))
\--
## How It Works
1. Your backend **generates a QR code** that encodes an OIDC authentication request.
2. The user **scans the QR code** with the Nuggets mobile app.
3. The app prompts the user to share the requested **Verifiable Credentials** (VCs).
4. After consent and validation, Nuggets completes the OIDC flow and redirects to your configured `redirect_uri` with a valid `id_token` and/or `access_token`.
5. Your application **decodes the token** and uses the embedded claims (e.g. DID, age, role) to grant access or customize the experience.
***
## Benefits
* **Privacy-first**: no passwords, no shared secrets
* **Standards-based**: built on OIDC and W3C Verifiable Credentials
* **User-controlled**: users share only what they choose
* **Zero visibility**: Nuggets runs the provider service inside a [Confidential Compute](https://en.wikipedia.org/wiki/Confidential_computing) environment—meaning even we can't see the data being processed
If no verifications are configured, users will see "unknown" as the requesting
party on the QR code screen.
***
## Configuring your flow
The user flow is determined by the OIDC scopes you specify. These scopes define what type of verification or information you require from the user during authentication.
* `rightToWork`: Request a Right to Work check from the user.
* `kyb`: Request the user to verify their business using KYB.
* `ageOver`: Request the user is over a specified age. This age will be passed as part of the PAR ([Pushed Authorization Request](https://datatracker.ietf.org/doc/html/rfc9126))
\--
## How It Works
1. Your backend **generates a QR code** that encodes an OIDC authentication request.
2. The user **scans the QR code** with the Nuggets mobile app.
3. The app prompts the user to share the requested **Verifiable Credentials** (VCs).
4. After consent and validation, Nuggets completes the OIDC flow and redirects to your configured `redirect_uri` with a valid `id_token` and/or `access_token`.
5. Your application **decodes the token** and uses the embedded claims (e.g. DID, age, role) to grant access or customize the experience.
***
## Benefits
* **Privacy-first**: no passwords, no shared secrets
* **Standards-based**: built on OIDC and W3C Verifiable Credentials
* **User-controlled**: users share only what they choose
* **Zero visibility**: Nuggets runs the provider service inside a [Confidential Compute](https://en.wikipedia.org/wiki/Confidential_computing) environment—meaning even we can't see the data being processed